WiFi/サーボで壁の照明スイッチをON/OFF 自作スマートスイッチ
WiFi/サーボで壁の照明スイッチをON/OFF 自作スマートスイッチ
WiFi/サーボで壁の照明スイッチをON/OFF 自作スマートスイッチ
Wi-Fi(wifi)モジュールESP8266の内、NodeMCU開発ボード1つとサーボモータ2つを使ってWiFi越しに縦並びの物理スイッチ(壁埋め込みの照明・電気スイッチ)2つをON/OFFするガジェットを作ってみるページ。
スマートとは言い難い気もしますが、一応、スマートスイッチ。
以前、やってみた電源タップでのArduino+サーボによるON/OFFデモを無線化し、実用的にしたもの。
取り付け方法にあぐねていたこともあり、必要性の点からも後回しにしてきました。
が、DCモータ、ギヤモータ、ステッピングモータ、サーボモータを使って何か実用品を作りたい!と思いつつ、なかなか思いつかない時は、やっぱりこれだよね、ということで今やることにした次第。
電動化後も、もちろん、手動での操作もできます。
無線操作するにあたり、ソフト的には、ESP8266・ESP32/WebSocketによる自作無線電動ロールスクリーンのステッピングモータをサーボモータに代えたに過ぎません。
結果、PC/スマホ/タブレットなどのブラウザからの操作だけでなく、スクリプト化し、デスクトップ版操作パネルからブラウザ操作パネルを表示したり、端末(≒ターミナル)からはもちろん、自作スマートスピーカーからの音声操作もできます。
WebSocketクライアント(ws://、SSL対応はwss://で始まるドメインやアドレスへのアクセス)には、JavaScriptやPython3.xを使いました。
前置き
完成後は不要かもしれませんが、モノがモノ、場所が場所だけにAruduinoOTAを使ってOTA(Over The Air/無線)アップデートできるようにしました。
そうそう要らないでしょ...と思っていたのですが、今回のケースでは、超絶便利でした。
これに伴い、3通りほどあるらしき、実装方法の内、Arduino IDEを使う前提のmDNS機能を必要とするものを選びました。
取付場所・取付方法
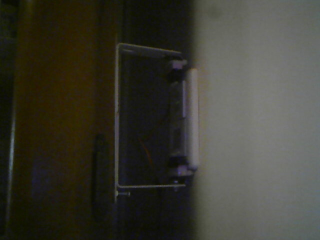
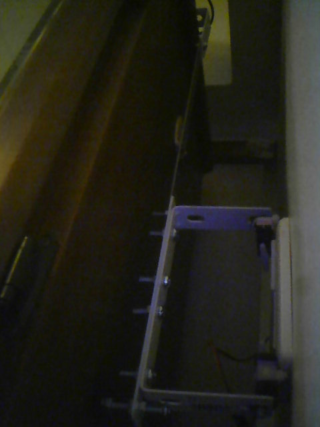
茶棚側面が10cmほどの距離で面した壁面スイッチにおいて茶棚側に画像の構造物を設置。
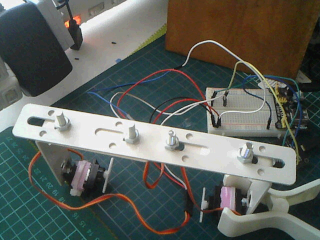
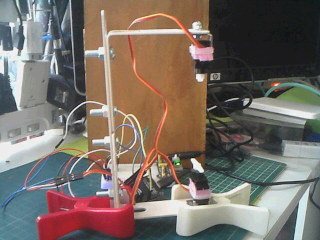
茶棚天板にL字ステー、これにストレートステーをつなげ、立ちおろし、ここに画像の構造物をボルト締め。
2つのL字ステー及び土台のストレートステーを共締めしたボルトの突起と、このL字ステーと先端のサーボ固定用小型L字ステーの大穴、長穴がスイッチまでの調整代(しろ)。
と言いつつ、これらのボルトは調整しろにするには、わずかに短く足りませんでした。
結局、微調整用のボルトナットとゴム板を駆使、その間、数回、茶棚自体も数mm?微妙に動かしたりもしました。
下のスイッチは完璧も逆さに付けたからか、個体の問題か、上のサーボがたまにびびることがあり、スイッチをONにした瞬間にOFFにしてしまったりで、それまで驚くほど思い描いた通りで順調だった中、最終的なスイッチまでの位置決めに最も時間がかかりました。
もう少し、スマートに位置決めできないものかと今尚、考えているほど。
設置する向きは、こんな感じです。
尚、今回対象となる照明用スイッチは、大きめである上、ON/OFFで左右ともに押さなければいけないもので試す前は、ホーンに何か抱かせた方が...とも思ったものの、サーボSG90の付属ホーンでいけました。
[2020/12/20]
下向きに付けたサーボは、この半年以内だと思いますが、回転角が小さくなったりして著しく成功率が下がってきたので1回交換、更に、ここのところ、ロックがかかったかのように指で回してさえ、サーボホーンが動かなくなることも重なり、プラスチック製ギアのSG90から金属ギアのMG90Sに交換、少なくとも下方向などイレギュラーな?向きに付けるサーボは、金属ギアなどより頑強なサーボの方が良いようです。
[2020/12/28]
騙し騙し使ってきましたが、不安定なので正常な向きのサーボもMG90Sに替えました。
やはり、SG90は実験程度に留めた方が良さそうです。
[2024/06/01]
あれから数年、下段スイッチ側の上向きに設置したサーボは安定稼働している一方、逆さまにした上部スイッチの方は、金属サーボにしても動作が不安定となることもあり、ソフトウェアリセットや電源OFF/ONの強制リセットをしたりもして、それこそ騙し騙し使ってきたのですが、思いきってお気に入りのユニポーラのままのステッピングモータ28BYJ-48 5VとステップモータドライバULN2003に替えることにしました。
28BYJと適度なサイズにカットしたMDF板をフランジ式のシャフトカプラーで固定。
上にしても下にしても横にしても安定していて良い感じの28BYJ...って、どっちが上かわかりませんが、ステー構造物上部からシャフト・軸を下に向け、ステーをモータ取り付け穴と適度な長さに切ったタミヤのユニバーサルアームで鋏み、ボルトとナットで2箇所固定。
スイッチとの間隔は、ステー上の長穴サイズ内の良き位置に微調整。
変更したスケッチは、後述。
制御部
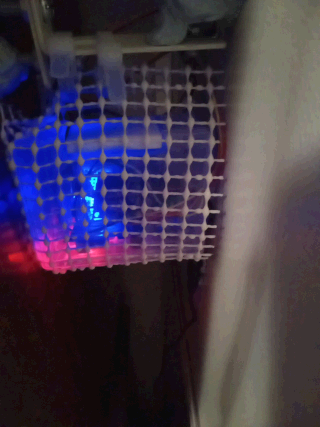
仮設のまま常用していましたが、重い腰を上げて、ガジェット筐体として、すっかり、お気に入りの100均セリアでトレカケース、キャンドゥで名刺ケースとして売っているケースに入れることにしました。
配線用に切り欠きを入れて放り込んだだけですが...。
また、下のアームにぶら下げるべく、なんかないかと思案、ちょうど買ってきたばかりのダイソーやキャンドゥで売っている大網の白い滑り止めマットに目が止まり、適当なサイズに切り、2つ折りにして繰り返し使える結束バンド2本を使うことにしました。
スペース的にもほぼぴったりであることもあり、有事の際の取り出しやすさ、筐体が落ちない点を重視、2つ折りにしてあるだけなのでよじって横から取り出すことができ、滑り止めマットだけに滑り落ちることもなく、大判の網網なので視認性もよく、周囲の色と同色の白ということで完璧。
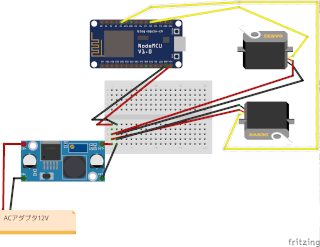
これまで400穴のブレッドボードにブレッドボード用電源、ACアダプタ12Vから電源供給しつつ、ESPボードにはUSB給電、サーボ2つ駆動というなんともかさばる構成を見えないことを良いことに茶棚側面に養生テープやブル・タックで仮留めした状態でしたが、ついでに電源をACアダプタ12Vのみからとり、降圧モジュールを追加、ミニブレッドボードに替えたので一気にすっきりしました。
ちなみにサーボの固定は養生テープから盛り盛りのブル・タックに替え、概ね良好も、この用途には、良くも悪くも粘度があって動作時の反動により、特に逆さまにしている上部スイッチ用は、極たまにスイッチ方向に押して近づけておいてあげる必要があります。
[後日談] 上のアームも巻き込んでブルタックをモリモリにしたら安定しました。
あ、画質落としすぎて茶棚や壁は特に荒くなってますね...。
一応、Fritzing。
使ったもの
- ESP8266 NodeMCU開発ボード x1
- microUSB-USB Aケーブル x1
- サーボモーターSG90 x2 ... [2020/12/20] プラじゃなく金属製ギアのサーボの方が安定するかも
- ブレッドボード
- ブレッドボード用電源(やDC-DC降圧コンバータ+DCジャック端子台アダプタ等)
- ACアダプタ12V/2A
- 2口電源タップ(今回は、集中スイッチ付きを使用)
- USB充電ACアダプタ
- ジャンパワイヤ
Amazon(Prime対応品)だと4000円前後、Aliexpressだと、これの4〜5割くらいで1500〜2000円あたりかと。
- ステー(ストレート 300mm) x1
- ステー(ストレート 195mm) x1
- ステー(L字・アングル 82x82mm) x3
- ステー(L字・アングル 20x20mm) x2
- ステー固定用ネジ
- ステー間固定用ボルト・ワッシャー・ナット
ステーは、300mmのストレートステー1つは100均(ダイソー)、それ以外のステーは、ホームセンターで使った分は600円前後、ステー固定用ネジやステー間固定用ボルト・ワッシャー・ナットも100均でセットで300円前後、単品なら100円前後かと。
- ドライバー・ボルト固定用工具
- インシュロック/結束バンド(サーボ固定用)
- 養生テープ(サーボ固定用)
材料については、個々の環境に合わせて適宜用意。
前提
mDNS機能を持つパッケージアプリケーションとしてLinuxならAvahi、Mac/WindowsならBonjourがインストール済みであること(macOSはBonjourはプリインストール済みのはず)。
Arduino IDEが利用できることは、もちろん、ESP8266やESP32をArduino IDEで使えるようにしておくこと。
ESP-01やESP-02〜ESP14などのESP8266チップなら、Arduino IDEの[ツール] => [ボード]から[Generic ESP8266 Module]を選択、ESPモジュールにスケッチをアップロードできる状態であること。
ESP32なら、[espressif/arduino-esp32]の要領でESPモジュールにスケッチをアップロードできる状態であること。
ちなみにこれらArduino IDEの環境設定で追加する方法の場合、カンマ区切りで複数指定可能。
回路
| ESP8266 NodeMCU | サーボ | 別電源 | 備考 |
|---|---|---|---|
| D4/GPIO02 | 信号線(橙) | - | サーボ1用 |
| D8/GPIO15 | 信号線(橙) | - | サーボ2用 |
| - | プラス(赤) | 5V | - |
| GND | マイナス(茶) | マイナス |
ブレッドボード用電源を介した場合、サーボを2つ使ったからか、ステッピングモータではできた一方、サーボ2つではできなかったため、今回は、ESP8266 NodeMCUの電源については、USB接続を前提にしています。
が、別電源の条件によっては、ESP8266 NodeMCUもVINからの供給も可能と思われます。
また、よく調べていませんが、ESP8266 NodeMCUボードにおいては、2つのサーボを操作するにあたり、何通りか試したところ、できないポートもあるようでサーボの信号線につなぐポートは、D4/GPIO02とD8/GPIO15ならいけました。
ブレッドボード電源に降圧を任せた今回、電源投入直後、たまに基準位置合わせに失敗することがあったり、停止時にビビリ音と共にサーボが振動(何れもわずか)することがありますが、適切な降圧コンバータを使うなど電源を強化すれば解消するのではと思っています。
今回は、壁面スイッチの真下下方にコンセントがあるため、ここに集中スイッチ付き2口電源タップを、そこに別電源とした12V/2A ACアダプタとUSB充電ACアダプタを挿すことにしましたが、電源をVINからとれるなら、もちろん2口電源タップやUSB充電ACアダプタ、USBケーブルは不要です。
AruduinoOTAアップデートがうまくいかない場合
もし、OTA(On The Air/無線)アップデートがうまくいかない場合、サンプルスケッチBasicOTAにおいてWiFi SSIDとパスフレーズのみ環境に合わせ、NodeMCUボードにアップロードしてから、目的のスケッチをアップロードしてみるとよいかもしれません。
スケッチ
今回のWebsocketサーバとなるESPチップ側のスケッチは、こんな感じ。
WebSocket communicationプロジェクトのスケッチをベースにさせて頂いたものです。
便利なもので後述のように(今回は、JavaScriptから)WebSocketのパスが呼ばれるとESP8266/ESP32にアップロードしたスケッチのwebSocketEvent関数がコールされ、payload引数にその値が入ってきます。
WebScokets.hのライブラリや、ベースとさせて頂いたスケッチにおける基本的な修正点、ESP32を使う場合の変更点などは、ESP8266・ESP32/WebSocket自作無線電動ロールスクリーン同様です。
前述の通り、上部スイッチ側の逆さ状態のサーボSG90から替えてあったMG90Sをステッピングモータ28BBYJ-48に替えたのに伴うスケッチは次のようになりました。
なお、気づけば、スケッチはESP8266のままとなっていますが、数年前からESP32、これによりライブラリもESPmDNSに替えてあり、Androidデバイス対策としてIPも固定、なぜか使えなくなったESP32WebServerにも対処するなど所々、変更を加えてあります。
HTML/JavaScript
なぜか、外部CSSは適用されるのに外部JavaScript(WebSocket.js)は適用されなかったのでJavaScript部分は、HTMLに埋め込みました。
押下ボタンを判別、送信するメソッド・関数sendCtrl(btn){}以外は、参照させて頂いたプロジェクト同様です。
テキスト(input type=text)は、外部スクリプトでうまくいかなかった際のボタン押下時のvalue値確認用です。
index.htmlのhead内は、必要な行のみ使い、外部CSSにも手は加えましたが、ちょっと雑さが目立ちますし、なくても機能確認には十分なので割愛します。
操作方法
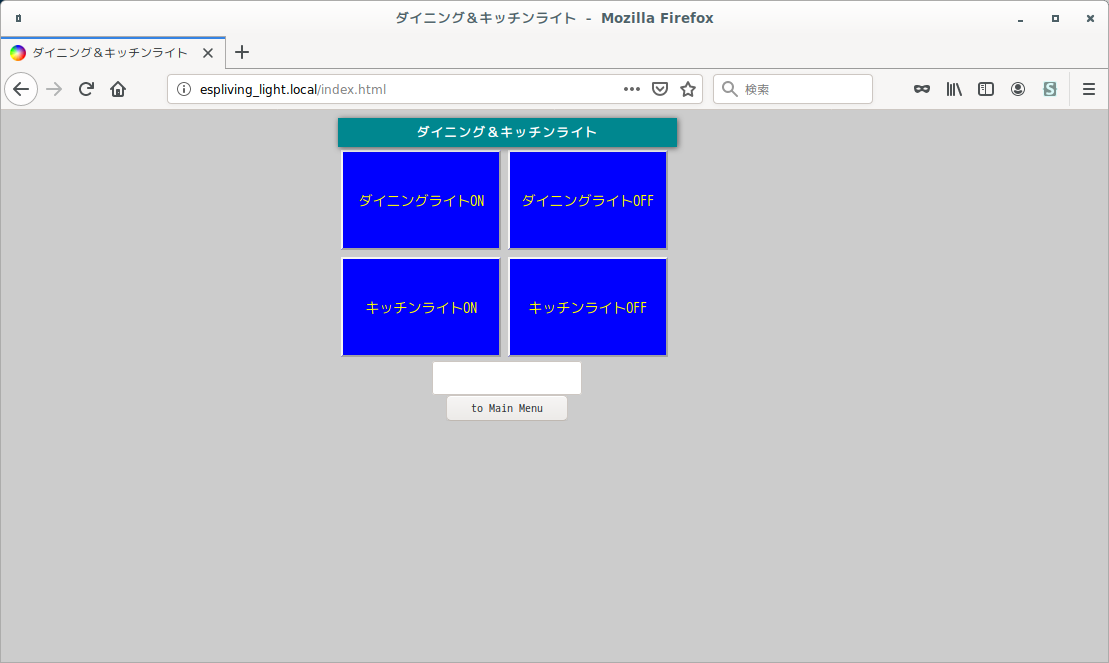
ブラウザにmDNS名でmDNS.local/index.htmlか、IPアドレスで***.***.***.***/index.htmlにアクセスすると、ダイニング用ライト、キッチン用ライトそれぞれのオン・オフ操作パネルが表示されます。
これなら、別途、ESP8266/ESP32で作って運用中の集中操作パネルとしているブラウザ版スマートホーム操作パネルに簡単に統合できます。
押下ボタンがわかると言えばわかるのでテキストボックスである必要はないものの、確認用なのであってもなくても可。
スクリプトから操作
例えば、Python(Python3)だと、まず、WebSocketクライアント(今回は、pipでwebsocket-client-py3)をインストール、スクリプトをこんな風に書けば、引数を渡して操作できます。
このようにスクリプトから操作できると自作ラズパイスマートスピーカーでダイニングキッチンライトスイッチ切り替えサーボを音声操作するのも容易にできるようになります。
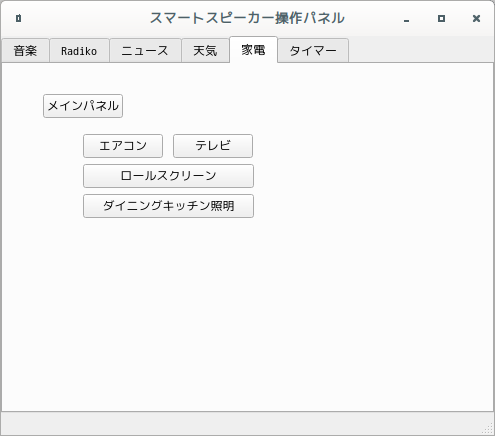
また、先の照明スイッチ用含め、ブラウザ版操作パネルをデスクトップ版操作パネルから呼ぶこともできます。
関連リンク
- ハードウェア
- ワンボードマイコン
- シングルボードコンピュータ
- Raspberry Pi
- Raspberry Pi導入検討に至った経緯
- Raspberry Piと関連パーツ購入を検討
- Raspberry Pi 2 Model B一式の選定と購入
- Raspberry Pi 2 Model B用OSの準備
- Raspbian Jessieの初期設定
- Raspbian Jessieで各種サーバを設定
- Raspberry Pi 2 Model B/Raspbianをサーバとして運用中
- ラズパイ用USBメモリ差替時LVMのinactiveでハマった話
- Raspbian Jessie 8からStretch 9へのアップグレード
- Raspbian Stretch 9からBuster 10へのアップグレード
- Raspberry Pi OS/Raspbian Buster 10からbullseye 11へのアップグレード
- Raspberry Pi OS BullseyeからBookwormへアップグレード
- Raspberry Piのホスト名変更とmDNS
- 自作スマートスピーカー用Raspberry Pi 3 B+を購入
- Raspberry Pi 3 Model B+とデスクトップPC周辺機器でパソコン化
- Raspberry Pi 3 Model B+とノートPC液晶他でパソコン化
- Raspberry Pi 3 Model B+とUSB HDDブート
- Raspberry Piの起動
- USB WiFiで復活したRaspberry Pi 3B+内蔵無線LANの謎
- ラズパイboot/reboot/shutdownボタン回路
- Raspberry Pi 3B+のハードウェア設定値がデフォルト値じゃない!?
- Raspberry Pi/スマホにWireGuardでVPN
- Raspberry Pi/スマホにSoftEther/OpenVPN互換でVPN
- Raspbianが勝手に喋りだした原因はOrca!?
- ラズパイ2 Bのディスクは3 B+で使えないの!?
- Raspberry PiでZoneMinderインストールとカメラ映像表示
- Raspberry Pi OS/Debian bullseyeにZoneMinderをインストール
- ラズパイ2BサーバのシステムディスクをUSBメモリからSSDに換装
- 謎が謎を呼ぶラズパイ2Bの挙動...と思いきや3B+でも同様
- HDMIケーブル接続のRaspberry Pi 2BとTVで動画視聴
- Raspberry Pi 400はサブパソコンを優に超越
- Raspberry Pi 400でできることは数知れず
- Raspberry Pi Imagerは時短にもなってすごい!
- SSHでPermission denied publickey 究極の対処法
- Raspberry Pi 400/arm64 Linux/Box86/Box64/WineでWindowsアプリ起動
- Raspberry Pi OSで壊れたPIXELとWineの復旧
- arm64 Raspberry Pi 400/Raspberry Pi OS/KVMで仮想化
- Raspberry Pi 400/Raspberry Pi OSにFlatpakをFlatpakからアプリをインストール
- Raspberry Pi 400/Raspberry Pi OSにsnapをsnapからアプリをインストール
- ラズパイで急に日本語入力不能にfcitx5-mozcからibus-kkcに変更・解決
- ラズパイ起動時デスクトップアイコン実行・フリーズ問題解決
- Raspberry Pi 400/USBメモリにAndroid 12L/LineageOS 19をインストール
- Raspberry Pi 400/USBメモリにAOSP 13/Android 13をインストール
- Raspberry Pi 400にWaydroidでLineageOS 18.xベースAndroid 11
- ラズパイ/Julius/Open JTalkでスマートスピーカーを自作
- Raspberry Piで見守り・防犯・監視カメラを自作
- ミニPC
- AMD Ryzen 7 8845HS搭載AOOSTAR GEM12 Pro MAXを買ってみた
- Windows 11/UbuntuインストーラLive USB作成とマルチブート
- AOOSTAR GEM12 Pro MAX搭載モニタ用Screen Control Software
- AMD Ryzen/RadeonチューニングアプリAMD Software
- CPU/GPU/iGPU/NPUを可視化する on Linux Ryzen 7 8845HS
- AIチャットボットCopilotをAMD Ryzen 7 8845HS AI PCで使う
- LM StudioでローカルAI on Linux/Windows Ryzen 7 8845HS
- Ollama/AlpacaとLLMでエッジAI on Linux Ryzen 7 8845HS
- ComfyUIやLocalAIでローカル生成AI on Linux Ryzen 7 8845HS
- Stable Diffusionでローカル生成AI on Linux Ryzen 7 8845HS
- 生成AIアプリAmuseをRyzen 7 8845HS/Hawk Pointで満喫
- AMD Ryzen AIソフトウェアのインストールから始まるRyzen AI
- PC
- 周辺機器
- モバイル
- フィーチャーフォン・ガラケー
- スマートフォン・タブレット
- スマホデビュー/Motorola moto g8 Power Lite
- Motorola moto g8 Power Lite用にスマホグッズ買ってみた
- Androidスマホの購入から使用まで
- Androidスマホやっておきたい初期設定
- Androidお気に入りのアプリ達
- Androidスマホバッテリーの節電設定と効果
- Miracast非対応Androidスマホmoto g8でAnyCastミラーリング成功
- スマホ乗り換え/Motorola moto g24
- Androidアプリストアの選択肢
- Android Studio
- SIMカード
- IoT/Internet of Things
- 電子工作・IoT超入門
- 電子工作・IoT入門1周年
- 電子工作・IoT入門から2年
- 電子工作・IoT入門から3年
- クラウドなしで快適スマートホームDIY
- スマート家電
- 電子工作・IoT用のパーツ
- IoT・電子工作購入品
- Arduino互換機ほかIoT・電子工作パーツ類の初購入
- Arduino互換機ほかIoT・電子工作パーツ類の追加購入1
- Arduino互換機ほかIoT・電子工作パーツ類の追加購入2
- Arduino互換機ほかIoT・電子工作パーツ類の追加購入3
- Arduino互換機ほかIoT・電子工作パーツ類の追加購入4
- Arduino互換機ほかIoT・電子工作パーツ類の追加購入5
- Arduino互換機ほかIoT・電子工作パーツ類の追加購入6
- Arduino互換機ほかIoT・電子工作パーツ類の追加購入7
- Arduino互換機ほかIoT・電子工作パーツ類の追加購入8
- Arduino互換機ほかIoT・電子工作パーツ類の追加購入9
- Arduino互換機ほかIoT・電子工作パーツ類の追加購入10
- Arduino互換機ほかIoT・電子工作パーツ類の追加購入11
- Arduino互換機ほかIoT・電子工作パーツ類の追加購入12
- Arduino互換機ほかIoT・電子工作パーツ類の追加購入13
- Arduino互換機ほかIoT・電子工作パーツ類の追加購入14
- Arduino互換機ほかIoT・電子工作パーツ類の追加購入15
- Arduino互換機ほかIoT・電子工作パーツ類の追加購入16
- Arduino互換機ほかIoT・電子工作パーツ類の追加購入17
- Arduino互換機ほかIoT・電子工作パーツ類の追加購入18
- Arduino互換機ほかIoT・電子工作パーツ類の追加購入19
- Arduino互換機ほかIoT・電子工作パーツ類の追加購入20
- Arduino互換機ほかIoT・電子工作パーツ類の追加購入21
- Arduino互換機ほかIoT・電子工作パーツ類の追加購入22
- Arduino互換機ほかIoT・電子工作パーツ類の追加購入23
- Arduino互換機ほかIoT・電子工作パーツ類の追加購入24
- Arduino互換機ほかIoT・電子工作パーツ類の追加購入25
- Arduino互換機ほかIoT・電子工作パーツ類の追加購入26
- Arduino互換機ほかIoT・電子工作パーツ類の追加購入27
- Arduino互換機ほかIoT・電子工作パーツ類の追加購入28
- Arduino互換機ほかIoT・電子工作パーツ類の追加購入29
- Arduino互換機ほかIoT・電子工作パーツ類の追加購入30
- Arduino互換機ほかIoT・電子工作パーツ類の追加購入31
- Arduino互換機ほかIoT・電子工作パーツ類の追加購入32
- Arduino互換機ほかIoT・電子工作パーツ類の追加購入33
- Arduino互換機ほかIoT・電子工作パーツ類の追加購入34
- IoT・電子工作用はんだごてセットやマルチメータ等を購入
- IoT・電子工作購入品レビュー【100円ショップグッズ編】
- 電子部品調達先の変遷
- 部品取りパーツ類
- 工具・治具・加工機
- 電源・測定器
- Arduinoで電子工作・IoT
- Autodesk CircuitsでArduinoをシミュレーション
- Arduinoで『鳥さんトリあえず距離トリたい装置』を作る
- Arduino鳥獣よけ装置HC-SR501/LDR/砲弾型LED
- Arduino鳥獣よけ装置RCWL-0516/LDR/砲弾型LED
- Arduino鳥獣よけ装置RCWL-0516/LDR/WS2812B
- Arduinoで『温湿度計付きデジタル時計』を作る
- Arduino/LCD1602/RTCでSleep/表示・バックライトON/OFF SW付き時計を作る
- Arduinoで『タッチパネル式集約リモコン』を作る
- Pro Mini 5V版/Nano 5V版/Uno版ArduinoISPを作る
- 箱や扉を開けたら灯りが点く簡易回路を作る
- 暗くなると明かりが灯る常夜灯・街路灯原理回路を作る
- ICL8038 機能信号発生器DIYキットを組み立てる
- LM317 可変DC安定化電源DIYキットを組み立てる
- オシロスコープKyutech Arduino Scope
- RogerioBego/Oscilloscope-Arduino-Processing
- Saleae Logic互換 8ch 24MHz ロジックアナライザを使う
- aster94/DIY Logic Analyzer
- Arduinoでトランジスタ/リレー/モータドライバを使ってDCモータを動かす
- Arduinoでリレーを使ってAC100V家電を制御
- Arduinoで『玄関チャイム・ドアベル・呼び出しベル・呼び鈴』を作る
- Arduinoでレーザーとフォトレジスタによる光遮断検知回路を作る
- Arduinoで赤外線LEDとフォトトランジスタによる透過型センサ回路を作る
- Arduinoで『電圧計』を作る
- Arduinoで『回転計』を作る
- Arduinoで『距離計』を作る
- Arduinoでエアコンを制御
- Arduinoで『オルゴールっぽいもの』を作る
- Arduinoで音楽再生『FMmelody』
- Arduinoで音楽再生『PCMAudio』Arduino Playground
- Arduinoで音楽再生『PlayMelody』Arduino Tutorial
- Arduinoで『侵入検知・防犯ブザー』を作る
- Arduino+LED/DMM/オシロ/ロジアナでPWMを可視化
- Arduinoで『暗がり補助・誘導イルミネーション』を作る
- Arduinoで『自動ON/OFFタイマー付きLEDライト』を作る
- 『LEDテープライトによるデスク下照明』を作る
- Arduinoで『LEDテープライトによるベッド下照明』を作る
- ArduinoでRGB LEDテープライト自動制御デモ
- ArduinoでNeoPixel WS2812B LEDテープライト制御
- ProcessingとArduinoでLチカ
- Arduino側センサ値をProcessingでグラフ化デモ
- ArduinoとProcessingでアナログ・デジタル時計(日付・温度付き)
- ArduinoとProcessingでジャイロ・加速度センサMPU6050デモ
- ArduinoとProcessingで2人用テニスのデモ
- ArduinoとProcessingでグラフィックイコライザー風表示
- ArduinoとProcessingでRGB LED操作デモ
- ProcessingとWebカメラで動体検知・追跡デモ
- Processingでデジタル画像・動画認識ライブラリOpenCVを使う
- JavaScriptとArduinoでLチカ
- PythonとArduinoでLチカ
- RubyとArduinoでLチカ
- PerlとArduinoでLチカ
- CとArduinoでLチカ
- Arduinoとサーボモータで1軸ソーラートラッカーのデモ
- Arduinoとステッピングモータで100均のターンテーブルを回す
- しゃべるArduino音声合成・再生デモ
- Arduinoあれこれ
- ESP8266で電子工作・IoT
- ESP-01用『GPIO0/リセットボタン付き簡易回路』を作る
- ESP-01/12/ESP32でブラウザ(スマホ/タブレット/PC)越しLED制御
- ESP-01/12/ESP32でmDNS(常時IPではなくホスト名でアクセス)
- ESP32とTFT液晶で『温湿度計付き時計』を作る
- しゃべるESP-01/12/ESP32音声合成・再生デモ
- ESP8266を2つ使った『WiFi玄関チャイム・呼び出しベル』を作る
- ESP32とI2S対応マイクINMP441入力音源の保存と再生
- ESP32/アンプ付I2S対応DAC MAX98357A/スピーカーで音源再生
- ESP32/FIFO無OV7670/TFT1.8/ブラウザ/Linuxで映像表示デモ
- ESP32-CAM/deep sleep/PIRセンサー/ext0復帰で映像表示
- ESP32-CAM/deep sleep/PIR/タクトスイッチ/ext1復帰で映像表示
- OV2640カメラ付きESP32-WROVER-DEVボードで自作ライブカメラ
- ESP32-WROVER/OV2640/deep sleep/ボタン/ext0復帰で映像を表示
- ESP-01/12/ESP32で『スマートリモコン』を作る
- ESP-01/12/ESP32でSHARP AQUOS TVをWiFi操作
- ESP-01/12/ESP32でSHARP製エアコンをWiFi操作
- ESP-01/12/ESP32で東芝エアコン大清快をWiFi操作
- ESP-01/12/ESP32でリモコン付き空気清浄機をWiFi操作
- ESP-01/12/ESP32でリモコン付き扇風機をWiFi操作
- ESP-01/12/ESP32で『スマートコンセント』を作る
- ブラウザ版スマートホーム操作パネルを作る
- 無線電動ロールスクリーンを自作 ESP8266・ESP32/MQTT
- 自作無線電動ロールカーテン/ロールスクリーン
- WiFi/サーボで壁の照明スイッチをON/OFF 自作スマートスイッチ
- WiFi/サーボでWebカメラのパン/チルト ESP8266・ESP32/WebSocket
- WiFi/サーボでペンダントライトをON/OFF 自作スマートプルスイッチ
- 使用中のカーテンを無線電動化 ESP8266・ESP32/WebSocket
- 自作スマートカーテン/自動開閉タイマー付き無線電動カーテン
- 自作タッチレスセンサー式スイング開閉スマートごみ箱
- 自作スマートロック/色々な方法で施錠・解錠
- ESP8266/ESP-WROOM-02/ESP32あれこれ
- Raspberry Piで電子工作・IoT
- Raspberry Pi/Julius/Open JTalkで『スマートスピーカー』を作る
- 主な基本機能
- Raspberry Pi 3 Model B+自作スマートスピーカーにラジオを追加
- Linuxパソコンに Julius/Open JTalkスマートスピーカー機能搭載
- ラズパイ400パソコンにJulius/OpenJTalkスマートスピーカー搭載
- ラズパイ3B+自作スマートスピーカーにニュース読み上げ機能追加
- Raspberry Pi 3 Model B+自作スマートスピーカーの自動起動設定
- ラズパイスマートスピーカーにUPnP/DLNAメディア再生機能を追加
- ラズベリーパイ 3 B+スマートスピーカーで定型アクションを実行
- ラズベリーパイ 3 B+自作スマートスピーカーにタイマー機能追加
- ラズベリーパイ 3 B+自作スマートスピーカーに音声メモ機能追加
- ラズパイ 3 B+自作スマートスピーカーに伝言メッセージ機能追加
- Julius / Open JTalkスマートスピーカーで OSS/ALSA/PulseAudio
- ラズパイ自作スマートスピーカーでYouTube音楽のストリーミング
- PyGTK/Gladeでラズパイ自作スマートスピーカー用操作パネル作成
- PyQt5/Qt Designerで自作スマートスピーカー用操作パネルを作成
- 突然音声が出なくなったスマートスピーカーのスピーカー音 復活
- Julius/Open JTalkスマートスピーカーからIPカメラの映像を表示
- 自作スマートスピーカーからビデオ会議や内線通話...etc.を開始
- 自作スマートスピーカー+Bluetoothスピーカーで聴取範囲を変更
- Raspberry Piで見守り・防犯・監視カメラシステムを自作
- Raspberry Piあれこれ
- 動画・ムービー
- 録音・再生・音源保存
- 音声合成・テキスト読み上げ
- 音声認識エンジン
- 動体検知Motion
- AI/人工知能
- AI開発環境
- DockerでTensorFlow/Keras開発環境を作る
- DockerでChainer開発環境を作る
- ChainerCV/YoloとWebカメラでリアルタイム物体検出デモ
- ChainerCV Object Detection/対象検出サンプルの実行
- ChainerRLとOpenAI Gymで強化学習シミュレーション
- DockerでPyTorch開発環境を作る
- 自然言語処理
- 自然言語処理ライブラリspaCy
- 形態素解析
- 構文解析/係り受け解析
- 自然言語処理モデル
- 自然言語処理モデルGPT
- 自然言語処理モデルGPT-3を使う
- OpenAI GPT-3のExamplesを試してみた
- OpenAI GPT-3のExamples/Chatを試してみた
- OpenAI GPT-3のExamples/Grammar correctionを試してみた
- OpenAI GPT-3のExamples/Natural language to OpenAI APIを試してみた
- OpenAI GPT-3のExamples/English to Frenchを試してみた
- OpenAI GPT-3のExamples/SQL translateを試してみた
- OpenAI GPT-3のExamples/Classificationを試してみた
- OpenAI GPT-3のExamples/Movie to Emojiを試してみた
- OpenAI GPT-3のExamples/Translate programming languagesを試してみた
- OpenAI GPT-3のExamples/Explain codeを試してみた
- OpenAI GPT-3のExamples/Factual answeringを試してみた
- OpenAI GPT-3のExamples/Product name generatorを試してみた
- OpenAI GPT-3のExamples/Python bug fixerを試してみた
- OpenAI GPT-3のExamples/JavaScript helper chatbotを試してみた
- OpenAI GPT-3のExamples/Science fiction book list makerを試してみた
- OpenAI GPT-3のExamples/Airport code extractorを試してみた
- OpenAI GPT-3のExamples/Extract contact informationを試してみた
- OpenAI GPT-3のExamples/Friend chatを試してみた
- OpenAI GPT-3のExamples/Write a Python docstringを試してみた
- OpenAI GPT-3のExamples/JavaScript one line functionを試してみた
- OpenAI GPT-3のExamples/Third-person converterを試してみた
- OpenAI GPT-3のExamples/VR fitness idea generatorを試してみた
- OpenAI GPT-3のExamples/Essay outlineを試してみた
- OpenAI GPT-3のExamples/Marv the sarcastic chat botを試してみた
- OpenAI GPT-3のExamples/Restaurant review creatorを試してみた
- OpenAI GPT-3のExamples/Interview questionsを試してみた
- OpenAI GPT-3のExamples/Q&Aを試してみた
- OpenAI GPT-3のExamples/Summarize for a 2nd graderを試してみた
- OpenAI GPT-3のExamples/Text to commandを試してみた
- OpenAI GPT-3のExamples/Natural language to Stripe APIを試してみた
- OpenAI GPT-3のExamples/Parse unstructured dataを試してみた
- OpenAI GPT-3のExamples/Python to natural languageを試してみた
- OpenAI GPT-3のExamples/Calculate Time Complexityを試してみた
- OpenAI GPT-3のExamples/Advanced tweet classifierを試してみた
- OpenAI GPT-3のExamples/Keywordsを試してみた
- OpenAI GPT-3のExamples/Ad from product descriptionを試してみた
- OpenAI GPT-3のExamples/TL;DR summarizationを試してみた
- OpenAI GPT-3のExamples/Spreadsheet generatorを試してみた
- OpenAI GPT-3のExamples/ML/AI language model tutorを試してみた
- OpenAI GPT-3のExamples/Tweet classifierを試してみた
- OpenAI GPT-3のExamples/SQL requestを試してみた
- OpenAI GPT-3のExamples/JavaScript to Pythonを試してみた
- OpenAI GPT-3のExamples/Mood to colorを試してみた
- OpenAI GPT-3のExamples/Analogy makerを試してみた
- OpenAI GPT-3のExamples/Micro horror story creatorを試してみた
- OpenAI GPT-3のExamples/Notes to summaryを試してみた
- OpenAI GPT-3のExamples/ESRB ratingを試してみた
- OpenAI GPT-3のExamples/Recipe generatorを試してみた
- OpenAI GPT-3のExamples/Turn by turn directionsを試してみた
- OpenAI GPT-3のExamples/Create study notesを試してみた
- コンピュータービジョン
